Wednesday, July 5, 2017

House warming party

House warming parties can go a few different ways.  Sometimes with a small dinner, large open door walk-through like an open house, or big BBQ's.  This time it was a an open door policy with a very simple theme, Chipotle and Easy.  It was fun!  The more we wanted to add the more we took away.  Honestly, headache free and fantastic!  I'd like to say my decor assistance was the best part of the party but no way, the food had it!  The new home owners created an amazing meal themed after Chipotle style ingredients but, so much better.
 
Anywho, here's how the partie looked. 
Below you will find burlap wrapped mason jars, citronella tea lights, butcher paper and colored pencils in tin cans.


Colored pencils are preferred to crayons on a hot day.


 A floor plan of the home to let people see the layout even without looking around.

 
A simple note pad to get addresses and names and numbers.  These days emails and word of mouth may be how you got people to your house so make sure to get there information while you have them.
 
 
Just to fill out the whole rustic Chipotle theme a old pallet board painted with black chalkboard paint then a handwritten menu in chalk.  It may not be something you'd find in a Chipotle but it is definitely rustic and in theme with the whole Recycle, Reuse, Repurpose stitch.

 
Using a unused grocery bag rolled down roughly you have a perfect chip bag/bowl.  Little bags cut down to take your chips to-go.
 
 
Love it when family/friends come through with fountain jugs.
 
 
If you put aluminum casserole dishes out with ice then put your bowls of salsas, sour cream, etc to keep them cool even in blazing heat.
 
 
Little chalkboard signs can help with the multiple salsa heat levels, unfortunately mine kept falling down in the ice pans. 
 
As un-glamorous it is, the trash/recycling is just as important as the party food and decorations.  Remember, being "green" is a 24/7 responsibility we often over look during parties. 
 
 
Desserts made by a fabulous friend set up inside and out of the way of the flies and heat.  We kept it simple with the desserts being the main decoration on the table.
 
 
Tortillas were kept warm in a narrow crock pot with a small crumpled piece of foil on the bottom so they didn't stick to the walls of the crockpot.  Even if the crock pot is on low/warm it can get pretty hot over time and things can stick if there is no water or seperation from the walls of the pot.
Husband is happy to finally be eating.


Thanks for stopping by. See me again soon!


Sunday, June 4, 2017

Dying Cotton Clothes

FROM THIS...
 
TO THIS.


I am here to show you how to make the kaki cotton fishing vest into the black beauty you see after.  I needed a black vest to dress my husband in for his 2017 Star Wars themed Family Reunion.  So, I hunted like crazy through thrift stores and sport supply shops and just anywhere I thought I might find something that could look like a modern day Han Solo.  Finally, I found the Field and Stream (exactly what I was looking for) but in kaki, it had too many pockets and zippers but, it fit my spouse and it was never worn and completely made of cotton.  For $6.79 it was mine.  Now, I just needed it to be black.
 
First I got your classic RIT dye.  I tried powder, liquid, adding salt, adding vinegar, cooking, letting it sit, well, just about every technique I could find but I just could make it look any darker than the "brown" vest pictured below.
 
It was so very frustrating.  My husband continued to tell me that it was fine, and it looked black to him but, as you can see it is not.  I was just about to give up when I decided to hit up Joann's to see what other options of dye they had.  When I hit up Joann's, the customer service rep at the cutting counter said that if the RIT dye couldn't do the job than no dye could and I should try washing it with RIT White Wash first.   I left there with his thumbs up to using RIT dye but was skeptical, so I also purchased one envelope of Dylon black dye.  I tried for the 5th time with White Wash first then RIT dye black afterwards with the same results. BROWN** BROWN** BROWN.  I was screaming in my kitchen!
 
It was time to try Dylon.  Well folks, it worked the first time and I could tell almost instantly that it would.  The water was the magic marker black you'd expect from a true black and the fabric almost instantly absorbed it.
 
 
Ingredients to dying cotton clothes:
Cotton Cloth/Clothes of choice
(just note that any thread or piece of fabric not made of cotton or dye able fabric it may vary in color)
Dylon Dye of your choice
16oz Jar of Salt for every 1lb of fabric (I used two)
Water (enough to cover the item of cloth)
Large Cooking pot (there are other methods but I chose the cooking option)
Rubber Gloves


Mix all the ingredients in the pot on Med-High and cook the item while stirring the pot and tugging and bending the fabric so it gets fully coated in the dye.  I cooked it for 30 minutes making sure it never got to the point of boiling.  It basically needs to simmer.  It completely set and coated the item of clothing rinse it off.  I rinsed my in the sink in the garage.  Be aware that the dye can and will stain things like porcelain tubs.  After the water runs clear it's time to put it through the washer.  This is truth hour.  If the dye truly did set in the fabric it will just wash off the extra dye that stuck around in between the fibers and leave you with nothing but the dyed fabric.  (don't worry about your washer, the dye will wash clear off)  If the dye stuck your fabric should look the same as it did in the pot.  YEAH!  You have just successfully dyed your first piece of clothing or cloth. :)


 Here is the after shot.  I also ended up cutting away the zippers and a few more pockets and I stitched down the flap on the back of the vest so the polyester mesh that would peek through.
 
 
Here you can see my husband in all his cuteness and he and I below.  His shirt was just a off white button down that we snipped the collar off of and the gun holster was made with brown vinyl and thrift store children's belts.  It was made to hold his cell phone instead of a laser blaster.
 
 
Come back and see me soon. I will you something cool. Maybe even how to make the blaster holster for you modern day cell phone users.
 

Saturday, October 1, 2016

Fall and Halloween Decor.

Fall to Halloween Décor

So, I don't really like the "scary side of Halloween" but, I really do like the chic side of Halloween.  All I have as far as décor is concerned is Fall/Thanksgiving décor.  To be able to still have my far transform into Halloween décor all it took were a few additions found at the $1 store. Here you go.

First I gathered a bunch of fall leaves and fall colored flowers from the $1 Tree.
Then I glued them down onto a pool noodle that had been glued together.

I used the space left over to wrap in burlap then make a big burlap bow to fill the negative space.


The wooden bat was purchased by my Mother last year so I just put it right over the top of the wreath.
Now, when I need to move past Halloween into just fall then I will just pull the bat off and it's ready to go.
http://www.clunkycrafts.com/2016/10/fall-and-halloween-decor.html

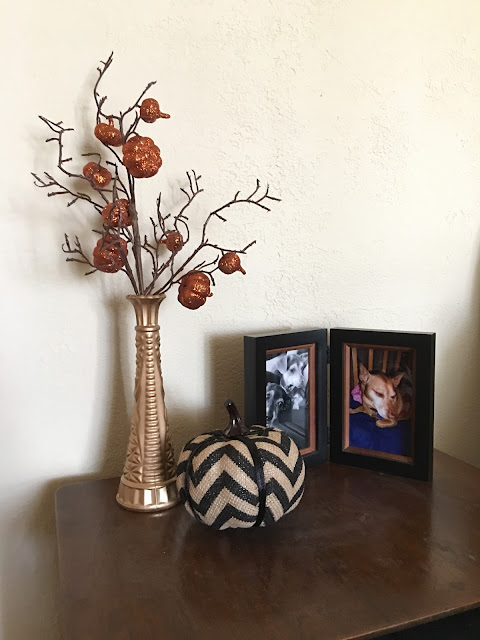
In this photo I found golden pumpkin twigs at 99cent Only store and this chic burlap chevron pumpkin.  I thought they jazzed up the space a little and at least the pumpkins as décor will go through thanksgiving too unlike skulls or the like.

By the way, the gold vase is just one of the many clear glass vases you can find anywhere spray painted in Krylon Gold.

Come by later to see what I am working on next.

Clay Pokemon Charms


I made a few little Pokémon and Pokémon Go Charms.
Hope you like.
Pokémon Go Charms
The Pokémon symbol has a glow in the dark center.

Handmade Minnie Mouse Ears

Most recent Ears...
Mostly Minnie but there are some kitten ears too.
Hope you like what you see. If you are interested go to the contact link and send me a message.

Maleficent Ears

Snow White Ears

Aristocats Marie Ears


Come see me again soon! :)

Tuesday, September 6, 2016

custom minnie mouse ears

Minnie mouse theme ears.
DIY
Handmade
ARIEL EARS

BUZZ LIGHTYEAR EARS
  
SHINY HULK EARS

ME IN SQUIRRELL EARS
  
HULK EARS

Come by and see me again soon!
BYE

Polymer clay August 2016


Hello.
So, at this point I hate blogging, but, I try to keep it up. Posting on a blog is just so much more complicated then posting on Instagram... but, if I want to pin any of this crud on Pinterest it has to be in a website... so, here you all go. :/  and when I say all I know I am just talking to myself. **Blah**
Mad Eye Moody

SAILORMOON
Deadpool

Assassins Creed

Powerpuff girls

See me soon.
Bye


Friday, July 15, 2016

Minnie Headband Ear Tutorial

Minnie Headband Ears Tutorial
Hello All!
I have finally finished a pictorial tutorial on Mouse Headband Ears.
I have done my own experimenting with a fantastic tutorial on AuntieTays website and I have also texted out the wear and tear stability of my tutorial and it seems to be the easiest, cheapest, and sturdiest of how-to technique.


So, here we go!
Need:
Fabric (best to not use stretch fabric)
Glue Gun
Sewing Machine (please don't hand stitch... to hard!)
Pins
Scissors
Batting
Foam Paper
Ear Templates
Pen or Pencil
Ruler
Headband (metal is best)

Step 1:
Make the template.  The Fabric template is 5cm circumference and the foam template is 4.5cm in circumference.  I cut the fabric template off at 4cm for the bottom of the template, also cut the bottom of the foam template at an arch 3cm is the highest point.
Step 2:
Draw the foam template onto the foam and cut.
Step 3:
Draw fabric template on the underside of the ear fabric.  Make sure to line it up in a way that it will be right side up when you turn it inside out.
Step 4:
Pin together the fabric making sure to have the outside fabric in the inside.
Step 5:
Stitch along the line making sure to leave the base unstitched.
Step 6:
Cut along the outside edge of the stitching leaving no more than half a cm of excess fabric.
Step 7:
Double fold the foam piece.
Step 8:
Stuff into the ears.
Step 9:
Cut the Batting into the Foam Size template.
Step 10:
I have seen it done by just stuffing batting into the ear but, unless it is done very tightly it tends to look lumpy. I don't personally like overly puffy ears so I just do one layer on one side of carefully cut batting.

Step 11:
Bow.
Fold over a different piece of fabric and then eyeball out how big the bow should be by placing the ears behind it then pinch the fabric in the middle to get an idea of how big the bow should be. (Average 6 inches wide and 4-5 inches high)
Step 12:
Cut and turn the fabric outside in folding lengthwise.
Step 13:
Stitch the edge down, but, leave a small gap right down the middle.
Step 14:
Cut along the stitch line then center the stitching then stitch down the sides.
Skip ahead...
Step 15:
Measure from the bottom of the headband and mark at 9cm.  You can see if you like the ears slightly higher or lower but this gives me the most accurate placement when I glue down the ears they never get wonky.
Step 16:
Glue down the edges inside the seams so that you have a clean glue line.
Step 17:
Glue the inside line of the base of foam...
Step 18:
Glue the Foam down to the headband lining up the end of the foam with 9cm mark.
Step 19:
Glue down the back flap of fabric to the headband overlapping into the inside of the of the ear.
Step 20:
Fold down and glue the front flap of fabric then glue that folded piece down towards the bottom of the headband.  Try not to let it overlap into the back of the ear.
 Step 21:
Take a scrap of fabric about 2" wide and 4-5" long.
Stitch down and then turn inside out.
Step 22:
Put a square layer of batting into the rectangle of fabric sewn up for the bow.
Step 23:
Glue down the strip into the seam.
Step 24:
In this situation, eyeballing may be the best way to go, especially since the strip of fabric probably isn't right in the middle of the rectangle. So, now eyeball the rectangle in between the ears with the seam in the back.
Step 25:
Glue down the base of the strip to the middle of the headband.
Step 26:
Fold the strip of fabric seam side down in a loop around the rectangle.
Step 27:
Fold down the strop of fabric then glue down to the underside of the bow.
DONE!!!
So, I know I was a little long winded but I just can't do videos so, written out it is.  Hopefully it is helpful in making your own ears.
Come back around soon to see what I'm working on next.