Wednesday, May 29, 2013

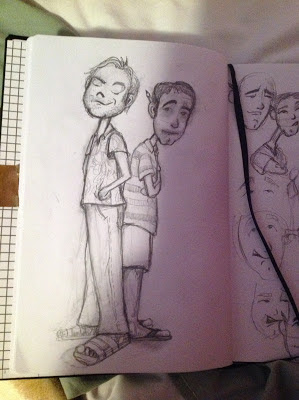
...here is the owl painting with signatures

So, this is the owl painting with all the signatures on the matte and a little in the painting.
 
Thanks again for reading and,
 
get to crafting and check in with me later kiddies.
If you want to keep up with what I'm doing follow me on Google +.
 

Pin It

Tuesday, May 28, 2013

Owl Retirement Sign-in/painting

I have been putting together a retirement party for my wonderful co-worker Micaela but, I only had a week to put it together.  This is just one of the things I have done over night too make this party happen.
I painted in watercolor a painting of a cute owl (our work logo is an owl face) and around it people will be signing.  Then we will stick it back in the frame and she will always be able to look at her wall and remember us.
 
Here is the picture of the final piece without the signatures of course. 

Maybe next time I will do something with fingerprints and signatures??
 
Hope you like it and thanks for reading.
 
Keep on crafting kiddies.  Any comments or questions?  Leave a message below.
 
Pin It

Sunday, May 26, 2013

Batman Beyond Painted shirt

I have done a few painted wearable art pieces before and my husband always wants me to make him something... I have reservations about it because I am obviously close to him, so, whatever I do has to be perfect.  When it comes to my style of art I am not perfect.  I am sloppy.  I try to do art as fast as possible.  So, to do something that is a well known logo (but I don't know it very well) than there is a lot of pressure to do it right.  I am somewhat pleased but I know there is a lot I can learn.  I would like it to be more of a screen printing technique for all of the shirts I plan to do.
 
Here are some pictures of my "in-perfect" process.
 
 
One part Fabric Textile Medium
Two parts paint
 
Iron it after it is completely dried just to sort of set the paint into the fabric.


Wash then air dry.
After it has been warn and dried for over 24 hours you can wash it normally.  There will be a little sticking don't stress, this is expected.  Just air dry it to cut down on pulled up paint.
 
Some tips to try for yourself.
 
1. Make sure your clothes are washed and dried.
2. Keep the fabric tight before painting. I used  binder clips and a cutting board.
3. Place a piece of plastic like a plastic bag underneath the shirt so it doesn't stick.
4. Create a stencil with self-adhering shelf paper using the negative space of the paper to fill in with the paint.]
 
Thanks for reading and if you have any tips or questions please comment below.
 
Don't stop crafting kiddies and follow me to keep up with what I'm doing next.

Tuesday, May 21, 2013

Finished Wine Cork Frame! Yeah!

 
I have finally finished and went with an entirely different look for the wine cork chalkboard.  It looks more "Italian chic," I think.  I couldn't use the tile and I didn't get to use as many corks but this turned out better.
 
Here are some pictures and the steps I took o make it.
 
First I found a cheap black frame that already had a dip in the frame just big enough to fit a row of wine corks into.
 
I then painted with some metallic paint dry brush style into the center line of the frame and the outer line to give it a little more interest and antiqued patina.
 
I found that you can paint the glass with chalk board paint so I sprayed it in black chalkboard paint than I reattached it to the frame.
 
The chalk had to go somewhere so I got a chalk holder and wrapped a bit of twine around it, tied it in a bow, tacked it down (with a bit of glue for safe measure) and boom, chalk on string!  Thank you once more for suggesting chalk on a piece of twine Diane!  You can now hang or lay this anywhere you want and never loose track of your chalk or any notes.  The corks double as, (who would have guessed it?) a corkboard! Ha!
 
Here's the final product ready for it's new owner Diane to put in her laundry room.  Love you Diane for donating all of the corks and allowing me to make you something pretty with them.


Thanks for reading and tell me what you think below.
 
See you next time and keep on crafting!
Pin It

Sunday, May 19, 2013

Wine cork, chalk board, and a tile...

It's too much, I tell you! Too much. Maybe... 
One medium size tile with a wine cork frame and a black chalk board all in one piece. I think it's too much... Let me know what you think before I get to gluing.  If I am wrong, tell me. 
I plan on putting a chalk holder in some of the cork space to the right of the tile.  But, I have to find something first.


Thanks for reading and keep on crafting kiddies.
 
Leave your comments below. 

Wednesday, May 15, 2013

web-sketching

Starting sketching again for a friend's website.  I just don't draw enough so it takes a ton of sketching before I'm somewhat satisfied to start actual painting.  I'm becoming very happy with this on.  Just need to put a puffy Siamese at their feet and I will be done!  Of course, I'm lying.  I still need to download it into my Ipad so I can do a digital version.  At least I finally got my Ipad back after I broke the screen (again) so, it's back to work I go. 
Wish me luck!

Ok, everyone. Thanks for reading and keep on crafting kiddies.

Comments and questions below please.


Monday, May 13, 2013

New use for dryer sheets

I was struggling!  I had refinished a dresser recently and it is beautiful, my only issue is it smells.  I had purchased the dresser at a thrift store and didn't realize how dirty it was and how much it smelled of smoke until I got it home.  I did a few cleaning techniques I found on Pinterest like bleach, and baking soda and even just letting it air out.  Although it was scrubbed clean I couldn't get the smell all of the way out.  I was hoping that once it was painted it wouldn't smell so bad.  I had read somewhere that the paint can block the smell but it only works if you paint the entire piece inside and out.  I didn't.  I thought it was as good as it's gonna get and I moved it into the house, lined the drawers, and filled each drawer with deodorizers.  I filled the drawers and hoped that it would just dissipate on it's own.  It didn't.
 
It has been about 3 or more months and every time I even walk into my craft room the smell fills my nose!  It's odor has blended with the deodorizes in the drawers and Wallflowers I plugged into the wall and it's awful.  I was contemplating selling it at a yard sale after I find a good replacement when a co-worker told me not to give up and just put a dryer sheet in each drawer and even underneath it.  I said "No way.  If bleach didn't work dryer sheets won't do anything.  I'm going to start looking for a new dresser."  She yelled back, "No!  Try it."
 
I was still pretty sure it wasn't going to work but I tried it anyway.  Literally the next day my dresser smelled amazing!  Seriously, the smell fades more and more everyday.  I feel like I can work in there again.  I'm so pleased.  I still haven't told my co-worker, but she is kind of a genius.  Love you Victoria!
 
 
Thanks so much for reading and keep on crafting kiddies. 
 
Please leave any comments or questions below.

Sunday, May 12, 2013

May book of the month

 
So, I do a little light "How To" reading on the side.  It's what started all of my wide range crafting and hobbies.  I've decided to start sharing my findings.  Here is the first suggestion.  With Kindle downloads often being free it makes things pretty easy to peruse the crafting isle of the book store without putting out a lot of money.
 
Just click the image to download the book now.  

**Remember the download costs may vary**
 
On 5/12/13 Practical Duct Tape Project is free to download.
 
Pin It

Saturday, May 11, 2013

Gothic-Bollywood nails... ??

This is the finished product... it makes me wish I had a better camera though.
  A very good friend of mine is going to her senior prom.  I am so proud of you Bridgette Valles!  She asked me to do her nails for the dance.  I was extremely excited and honored by her request.  It is a Bollywood themed dance and she was wanting a Bollywood themed design.  The design is not awfully obvious.  I wish I had more time to prep but she trusted me to do what my paintbrush could do.  So we ate, chatted and worked it out nail by nail. 
  She's a little Goth, but still loves color, so, we just had a good time scouring Pinterest to decide what to do.  In the end I just did whatever felt right.  
 
  In case you were wondering I used a base coat of a dark pink with a pearly blue coat of Sally Hansen's Hard as Nails  then I used some acrylics for the detailing.  Coat the whole nail in Sally Hansen's Instant dry and the acrylic just pops!  Don't ever be afraid to follow your hand and heart into fun loose nail art.
 
Thanks for reading and keep on crafting. Love ya kiddies!
 
Comments or questions below please.
Pin It


Friday, May 10, 2013

Reuse for Contact Cases

 
Do you have an over abundance of contact cases cluttering your drawers? 
 Me neither, but I did have a few empty never to be used cases that I couldn't bear to toss. I knew there had to be something of use there. There was. I used to be a big believer in giant purses but recently I had found that all the extra bulk was far to cumbersome. When I would go to the Cherry Auction (a local swap meet in Fresno, CA) or running around checking out the yard sales I found that my shoulder just can't take the weight. So, I've found a super cute teeny-tiny purse and had to condense all of the "necessities" I would carry in it. 
 
Ok, here comes the list of things to do with your empty contact case:
  1. Fill with lotion (personal I put some moisturizer into one side and lotion in the other)
  2. Put pills for the go (I have a few allergies and I get headaches so those were my go to pills)
  3. Double reuse, you could slowly fill up the container with the bit of leftover Chapstick that won't roll out enough to use.
  4. Vaseline and Neosporin
Ok, so I think you get the idea. 
Consider customizing the cases with nail polish on the caps, or googly eyes on the caps might be a good way to cheer you up when you need the Neosporin. So, have fun with it and make it your own.
 
(If you aren't particularly artsy but want a cute case, I found these at Target in the $1 section of the store.)
 
Comment below with any other ideas or opinions.


So thanks for reading and keep on crafting.

Thursday, May 9, 2013

Sketching

Ok, I have begun sketching a few new things for a website and than I might be meeting up with someone else about another art project.  I wish sometimes that I would finish what I started just once before moving on to something else. HA!  Maybe someday I will even put up a proper header with image on this wonderful website.  Until then, I will keep pushing forward and I will try not leaving you all hanging without a another tutorial for long. 

Oh, you're still here?  Good!  Here is my suggestion of the week.  Recently I cracked my iPad screen so I needed to go back to sketching on actual paper until it's fixed. (hehehehe)  I am actually very pleased by this forced return to old fashion pencil to paper working but I really needed a place to keep my pencil.  While I was thinking and looking at all of the things I have around the house I saw a medium sized binderclip.  BOOM!  I have just created a pencil holder for my sketch book!  I clipped the binder clip to the side of the book to slip a mechanical pencil or pen into and outside of without losing them or squishing them in between the pages bending the book out of shape.  I hope this helps cut down the loosed pencils.


Thanks for reading and keep on crafting kiddies.

Please leave any comments below.

Tuesday, May 7, 2013

...already tired

 I am already tired and I haven't done anything yet.
Have you ever had so many things in the works, too much on your plate, too many balls in the air that you just can't even bear to begin anything?  That is me right now.  I have project after project coming at me and I think I may have handled them better but I just came back from my week vacation and I just can't imagine doing all of those tasks now. Ha! 
 Now, don't misunderstand me kiddies, I will get them done, happy to do them, it's just that right now I am overwhelmed.  I really need to make a few lists to get it all of my own ideas out of my head.  So, off I go to create a list full of ideas and to-dos.  Wish me luck.  Muwah! (kissy lips)
I leave you all with a couple of photos from my fabulous vacation. 

 These were taken at a Cambodian Buddhist Temple near the Nisqually Indian reservation/casino in Washington state.  My Mother and I just saw it on the side of the road and had to pull in to take a look.  It was beautiful.  The Buddha was about 7ft tall at the least and the Fu Dogs were about 3ft tall.