Saturday, October 1, 2016

Fall and Halloween Decor.

Fall to Halloween Décor

So, I don't really like the "scary side of Halloween" but, I really do like the chic side of Halloween.  All I have as far as décor is concerned is Fall/Thanksgiving décor.  To be able to still have my far transform into Halloween décor all it took were a few additions found at the $1 store. Here you go.

First I gathered a bunch of fall leaves and fall colored flowers from the $1 Tree.
Then I glued them down onto a pool noodle that had been glued together.

I used the space left over to wrap in burlap then make a big burlap bow to fill the negative space.


The wooden bat was purchased by my Mother last year so I just put it right over the top of the wreath.
Now, when I need to move past Halloween into just fall then I will just pull the bat off and it's ready to go.
http://www.clunkycrafts.com/2016/10/fall-and-halloween-decor.html

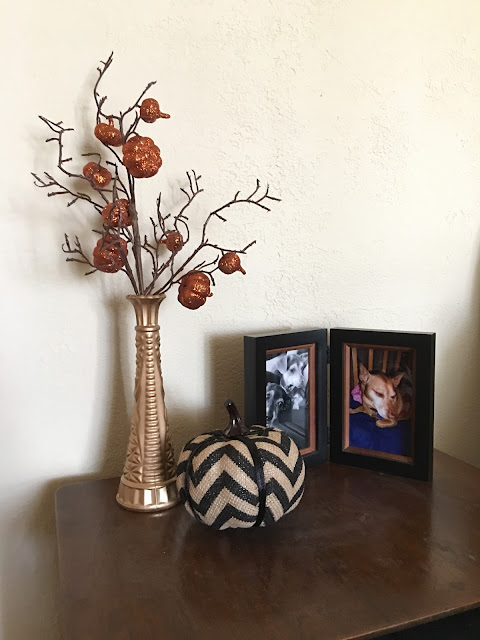
In this photo I found golden pumpkin twigs at 99cent Only store and this chic burlap chevron pumpkin.  I thought they jazzed up the space a little and at least the pumpkins as décor will go through thanksgiving too unlike skulls or the like.

By the way, the gold vase is just one of the many clear glass vases you can find anywhere spray painted in Krylon Gold.

Come by later to see what I am working on next.

Clay Pokemon Charms


I made a few little Pokémon and Pokémon Go Charms.
Hope you like.
Pokémon Go Charms
The Pokémon symbol has a glow in the dark center.

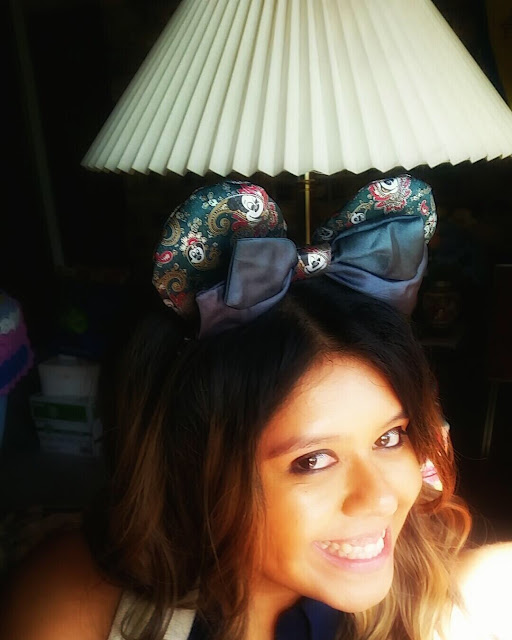
Handmade Minnie Mouse Ears

Most recent Ears...
Mostly Minnie but there are some kitten ears too.
Hope you like what you see. If you are interested go to the contact link and send me a message.

Maleficent Ears

Snow White Ears

Aristocats Marie Ears


Come see me again soon! :)

Tuesday, September 6, 2016

custom minnie mouse ears

Minnie mouse theme ears.
DIY
Handmade
ARIEL EARS

BUZZ LIGHTYEAR EARS
  
SHINY HULK EARS

ME IN SQUIRRELL EARS
  
HULK EARS

Come by and see me again soon!
BYE

Polymer clay August 2016


Hello.
So, at this point I hate blogging, but, I try to keep it up. Posting on a blog is just so much more complicated then posting on Instagram... but, if I want to pin any of this crud on Pinterest it has to be in a website... so, here you all go. :/  and when I say all I know I am just talking to myself. **Blah**
Mad Eye Moody

SAILORMOON
Deadpool

Assassins Creed

Powerpuff girls

See me soon.
Bye


Friday, July 15, 2016

Minnie Headband Ear Tutorial

Minnie Headband Ears Tutorial
Hello All!
I have finally finished a pictorial tutorial on Mouse Headband Ears.
I have done my own experimenting with a fantastic tutorial on AuntieTays website and I have also texted out the wear and tear stability of my tutorial and it seems to be the easiest, cheapest, and sturdiest of how-to technique.


So, here we go!
Need:
Fabric (best to not use stretch fabric)
Glue Gun
Sewing Machine (please don't hand stitch... to hard!)
Pins
Scissors
Batting
Foam Paper
Ear Templates
Pen or Pencil
Ruler
Headband (metal is best)

Step 1:
Make the template.  The Fabric template is 5cm circumference and the foam template is 4.5cm in circumference.  I cut the fabric template off at 4cm for the bottom of the template, also cut the bottom of the foam template at an arch 3cm is the highest point.
Step 2:
Draw the foam template onto the foam and cut.
Step 3:
Draw fabric template on the underside of the ear fabric.  Make sure to line it up in a way that it will be right side up when you turn it inside out.
Step 4:
Pin together the fabric making sure to have the outside fabric in the inside.
Step 5:
Stitch along the line making sure to leave the base unstitched.
Step 6:
Cut along the outside edge of the stitching leaving no more than half a cm of excess fabric.
Step 7:
Double fold the foam piece.
Step 8:
Stuff into the ears.
Step 9:
Cut the Batting into the Foam Size template.
Step 10:
I have seen it done by just stuffing batting into the ear but, unless it is done very tightly it tends to look lumpy. I don't personally like overly puffy ears so I just do one layer on one side of carefully cut batting.

Step 11:
Bow.
Fold over a different piece of fabric and then eyeball out how big the bow should be by placing the ears behind it then pinch the fabric in the middle to get an idea of how big the bow should be. (Average 6 inches wide and 4-5 inches high)
Step 12:
Cut and turn the fabric outside in folding lengthwise.
Step 13:
Stitch the edge down, but, leave a small gap right down the middle.
Step 14:
Cut along the stitch line then center the stitching then stitch down the sides.
Skip ahead...
Step 15:
Measure from the bottom of the headband and mark at 9cm.  You can see if you like the ears slightly higher or lower but this gives me the most accurate placement when I glue down the ears they never get wonky.
Step 16:
Glue down the edges inside the seams so that you have a clean glue line.
Step 17:
Glue the inside line of the base of foam...
Step 18:
Glue the Foam down to the headband lining up the end of the foam with 9cm mark.
Step 19:
Glue down the back flap of fabric to the headband overlapping into the inside of the of the ear.
Step 20:
Fold down and glue the front flap of fabric then glue that folded piece down towards the bottom of the headband.  Try not to let it overlap into the back of the ear.
 Step 21:
Take a scrap of fabric about 2" wide and 4-5" long.
Stitch down and then turn inside out.
Step 22:
Put a square layer of batting into the rectangle of fabric sewn up for the bow.
Step 23:
Glue down the strip into the seam.
Step 24:
In this situation, eyeballing may be the best way to go, especially since the strip of fabric probably isn't right in the middle of the rectangle. So, now eyeball the rectangle in between the ears with the seam in the back.
Step 25:
Glue down the base of the strip to the middle of the headband.
Step 26:
Fold the strip of fabric seam side down in a loop around the rectangle.
Step 27:
Fold down the strop of fabric then glue down to the underside of the bow.
DONE!!!
So, I know I was a little long winded but I just can't do videos so, written out it is.  Hopefully it is helpful in making your own ears.
Come back around soon to see what I'm working on next.




Monday, May 16, 2016

New minnie and Mickey Ears

Hello there,
It's been a bit of time but I have done a few more ears since I last checked in. Hope you like them.
P.S. Next post will hopeflly be a tutorial


Hipster Mickey Beanie
Glitzy Ariel Themed ears


Updated bow

Come back and see me soon!

Thursday, April 28, 2016

Minnie Ears Atempt Number Two

Two attempts at Minnie themed ears so far. The first attempt at the top was done three times before I even got to the semi good point you see below.  The second official attempt never made it to a headband and, the third attempt (I'm calling my second) turned out pretty good but maybe the bow was just a little to big... or is it?


suggested you tube tutorial until I make my own... still working out all the kinks.
 

Saturday, March 12, 2016

DIY Apothecary Jars

Want those gorgeous apothecary jars from Crate and Barrel or out of your favorite antique shop?  Me too.  More so as of late, once I saw all the cute things people did with them like, candy buffets, table displays, craft supply displays, etc.  So, when I saw the price, as always, I was not impressed.  Time to make my own. 
I knew I could do it with Goop or E3000 glue because of a recent go at cake plates.
 After a bit of searching on Pinterest I found out what others were using to piece together an apothecary jar. A vase/jar and something to stand it on is the least difficult part to this DIY.  I liked the look of candle sticks and really round vases with wide mouths.  The most difficult task is finding items to piece together that look, act and fit like a proper apothecary lid.  That was hard.  I have a lot of bowls, plates and even lids that didn't work with any of the vases I got.  This is why you may want to try to get everything fitted together while you are out shopping.  You don't want to end up with a box of glass bowls, plates and vases you can't use like I did.
Basically the best lids are made with small bowls and plates that are not overly heavy or unevenly weighted otherwise, it won't sit well on the mouth of the vases/bowls you are using as your main jar and might even tip right off the vase probably smashing the vase or lid on the way down.  Even though the lids are small bowls, plates, etc they should end up looking pretty believable on the whole.  Especially believable when you use a bauble, glass knob or small glass lid from a glass candle jar on top of said small bowl or plate lid.
** I am probably running before I walk by showing this tutorial before showing a simple cake plate tutorial but, I loved this soooo much I couldn't bother with the cake plate.**
 
So, off we go...
Gather one vase or bowl for each apothecary jar, one plate or bowl that fits in each vase as a lid, candle sticks for the stands, and small votive holders or small candle lids for the lid knobs. **one note: I like to make sure the average hand can go all the way to the bottom of the jar or vase that you ensure no hand is lost.**

 
Step 2:
Grab your Goop glue and pieces to create one apothecary.  I try to put them all together without glue to make sure everything fits and that they are aesthetically pleasing as a whole.
 

Step 3:
Glue the pieces together being careful to not put too much or too little glue then, I have found that trying to wipe away around the edges ends up making it messier than just letting it dry where they lay. 
Don't forget to not glue the lid down... that might sound dumb but it can happen.

I really liked this particular lid.  I found a really light glass plate which I think it wasn't meant to be a food plate but it is the only description I have.  I also used a lid from a small $1 tree Yankee style candle for the knob for the lid.  I just ripped off the plastic gripping from the lid and glued it down to the middle of the back of the plate.  That's the lid.
 

Finished Apothecary Jar


Glue the candle stick to the bottom of the vase and after you have let it dry over night you will have the whole apothecary jar completed and ready for whatever filler you want.
 
These into That


This is my favorite.  It was some of the most random pieces that seemed to come together to create a very cool very seamless piece.

Thanks to everyone for coming back to visit me.  See you as soon as I can with some new stuff.

Sunday, January 10, 2016

January polymer update 2016

Sally from Nightmare Before Christmas
 
Malificent
 
Mickey ornament
 
Star Wars themed charms
 
Chewbacca
 
R2D2 bow necklace
 

Yoda

Thanks all for coming to visit again.  Hope to see you the next time I remember to post something. ;)

Wednesday, January 6, 2016

Star Wars Inspired Polymer Movie Poster

Hello All.  It's been forever, I know.  The holidays, you know how it is.  Anyways, I have been slowly getting things done.  This was the biggie.  If you are interested in in a copy of the print I am selling 24x36 sized posters and 5x7 prints. 
Email me with any requests.
Star Wars inspired movie poster
 Hope you all like what you see.  Don't forget to follow me on Instagram to keep up with what I am doing and my daily life at Clunkycrafts.
 
See you all again soon... I will try anyways. :)